The Webflow CMS Blueprint for SEO: Building Content Hubs That Dominate
You’ve been doing everything right. You’re publishing consistent, high-quality content. Your blog has grown from a handful of posts to over 50 articles. But instead of feeling like you’re building an asset, it feels like you’re managing a mess.
Interlinking posts is a manual, chaotic process. Your site structure feels flat. You’re creating a lot of content, but you aren’t building any real authority. Search traffic is stagnant.
If this sounds familiar, take a deep breath. The problem isn’t your content it's your CMS architecture.
Most Webflow users start with a single, simple "Blog Posts" collection. It’s perfect for the first 20 articles. But as you scale, this simple structure starts to work against you, making it nearly impossible to signal deep expertise to search engines like Google.
This guide will show you how to move beyond a simple blog and architect a powerful content hub in Webflow. We’ll teach you how to think strategically about your CMS so you can build true topical authority, improve your SEO, and turn your content into a predictable growth engine.
What is Topical Authority, Anyway? (And Why Google Cares)
Before we dive into Webflow, let's get clear on the goal. Topical authority is an SEO concept that means Google sees your website as a credible, expert source on a specific subject.
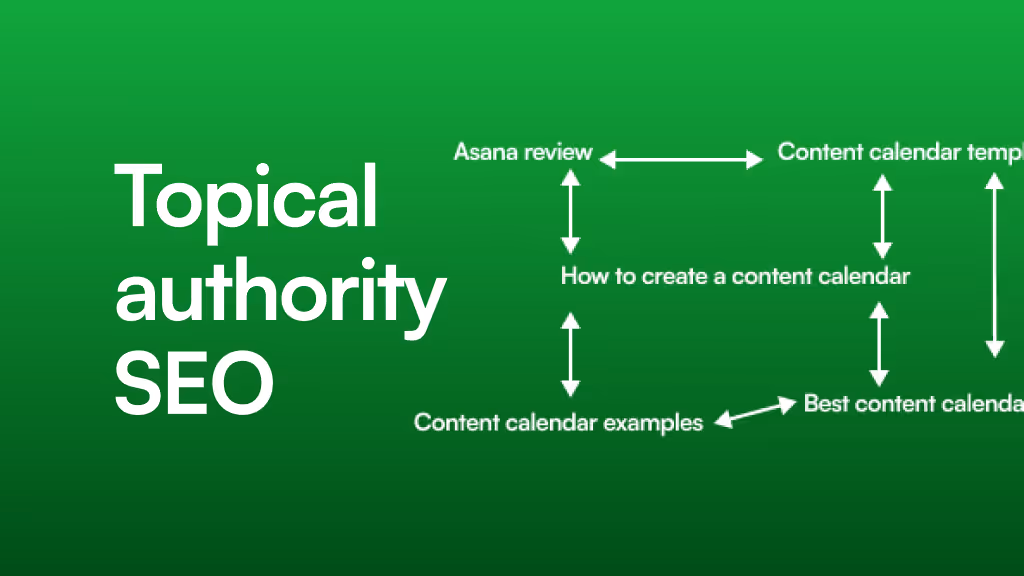
Think of it like a library. A library doesn't just have one giant shelf labeled "Books." It has a structured system the Dewey Decimal System that groups books by subject. There's a section for History, and within that, subsections for American History, European History, and so on. This structure makes it easy for visitors to find what they need and signals that the library has deep knowledge on many topics.
Google wants to see the same kind of logical structure on your website. When you strategically group and interlink your content around core themes, you’re not just organizing your site for users; you’re showing Google that you have comprehensive knowledge on a topic. This is how you earn higher rankings.
The building blocks for this in Webflow are its powerful CMS features:
- Collections: Think of these as spreadsheets or databases for your content (e.g., a collection for Blog Posts, a collection for Authors, a collection for Services).
- Reference & Multi-Reference Fields: These are the magic connectors. They allow an item in one collection to link to an item in another. This is how you tell Webflow, "This specific blog post belongs to the 'Digital Marketing' topic."
The Great Misconception: URL Structure vs. Interlinking
A quick search on Webflow forums reveals a common obsession: getting the "perfect" URL structure, like /blog/marketing/my-awesome-post. Many believe this folder-like URL is the key to creating topic clusters.
Here’s the truth that will save you hours of frustration: A powerful internal linking structure is far more important to Google than a perfectly manicured URL.
While clean URLs are good practice, Google is sophisticated. It understands relationships between pages based on which pages link to each other. A well-linked group of articles on a single topic sends a much stronger signal of authority than a rigid URL path.
The takeaway? Don't get stuck trying to force a specific URL structure. Focus on building meaningful connections between your content. The rest of this guide will show you exactly how.
Two Blueprints for Your Webflow Content Hub
So, how do you architect these connections? There are two primary models for structuring a content hub in Webflow. Each has its place, but one is vastly more powerful for building authority.
Model 1: The Simple Library (Single Collection with Categories)
This is the most common starting point. You have one "Blog Posts" collection, and you add a separate "Categories" collection. You then use a Reference Field in your Blog Posts collection to assign each post to a category.
How it works:
- You have a Blog Posts collection.
- You have a Categories collection (with items like "Marketing," "SEO," "Web Design").
- In the Blog Posts collection, a single-reference field called "Category" lets you pick one category for each post.
This structure allows you to create category pages that automatically list all the blog posts assigned to them. It's clean, simple, and a great first step.
| Pros | Cons |
| ✅ Easy and fast to set up. | ❌ Less scalable for deep authority. |
| ✅ Intuitive for beginners. | ❌ Each post can only belong to one main pillar. |
| ✅ Good for small blogs or simple content needs. | ❌ Makes it harder to build complex content silos. |
Model 2: The Hub-and-Spoke Powerhouse (Multiple Collections with References)
This is the model the pros use. It’s designed from the ground up to build topical authority. Instead of lumping everything into one "Blog" collection, you create separate collections for your main "Pillar Pages" and your supporting "Cluster Posts."
- Pillar Pages Collection: This holds your broad, comprehensive "hub" pages. These are the definitive guides on your main topics (e.g., "The Ultimate Guide to Webflow SEO").
- Cluster Posts Collection: This holds all your supporting articles that dive deep into specific sub-topics related to a pillar (e.g., "5 Ways to Optimize Images in Webflow," "How to Write SEO-Friendly Meta Descriptions").
The magic happens when you use a Multi-Reference Field to connect them. Each Cluster Post can reference its main Pillar Page, and each Pillar Page can reference all of its supporting Cluster Posts. This creates a powerful, interconnected web of content that Google loves. This level of strategic setup is a core part of effective Webflow development, transforming a simple site into a sophisticated marketing platform.
| Pros | Cons |
| ✅ Creates powerful, crawlable content silos. | ❌ More complex initial setup. |
| ✅ Clearly signals deep expertise to Google. | ❌ Requires more strategic content planning. |
| ✅ Highly scalable for hundreds of articles. | |
| ✅ Automates "Related Posts" sections perfectly. | |
Building the Hub-and-Spoke Model: A Practical Walkthrough
Ready to build a proper content hub? Here’s a simplified step-by-step guide to setting up the Hub-and-Spoke model in Webflow.
Step 1: Create Your "Pillar Pages" Collection
First, create a new CMS Collection called "Pillar Pages" (or "Topics," "Hubs," etc.). This will house your main cornerstone content. Keep the fields simple for now: Name, Slug, Rich Text for the body content, and an SEO Title/Description.
Step 2: Create Your "Cluster Posts" Collection
Next, create your main "Cluster Posts" Collection. This will be where your day-to-day articles live. It will have similar fields: Name, Slug, Post Body, etc.
Step 3: Add the Multi-Reference Field (The Connector)
This is the crucial step. Go into the settings for your "Cluster Posts" collection.
- Add a new field.
- Select "Multi-reference" from the field type list.
- In the configuration panel, select your "Pillar Pages" collection as the source.
- Name the field something clear, like "Related Pillar Page."
Now, when you create a new cluster post, you’ll see a field that lets you select which pillar page(s) it supports.
Step 4: Display the Connections Dynamically
With the structure in place, you can now automate your interlinking.
- On your Pillar Page Template: Add a Collection List and filter it to show all "Cluster Posts" that reference the current Pillar Page. You’ve just created a dynamic, automated list of all supporting articles.
- On your Cluster Post Template: Add an element (like a link block or a small section) and bind it to the "Related Pillar Page" reference field. This automatically links each cluster post back up to its main hub page.
Executing a flawless CMS migration or complex setup like this requires precision. For projects on a tight timeline, services like WSC Hyperspeed can ensure that your foundational architecture is built quickly and correctly from the start.
Frequently Asked Questions (FAQ)
Is Webflow good for SEO?
Absolutely. Webflow provides all the essential tools you need for excellent technical SEO: clean code, control over meta titles and descriptions, 301 redirects, canonical tags, and a fast, reliable hosting infrastructure. However, like any tool, its SEO effectiveness depends on your strategy which is why structuring your CMS correctly is so important.
What's the difference between a category and a tag?
In a strategic CMS structure, a "Category" or "Pillar Page" represents a broad topic that you are building authority in (the hub). "Tags" are more granular, describing specific keywords or attributes within a post (e.g., "Beginner," "Case Study," "Animation"). A post should have one primary pillar but can have multiple tags.
Can I change my CMS structure later?
Yes, but it can be a significant undertaking, especially with a large volume of content. It often involves exporting content, restructuring collections, and carefully mapping redirects to avoid breaking links and losing SEO value. It's always best to plan your architecture proactively.
How many pillar pages should I have?
Start with 3-5 core topics that are most important to your business. It's better to build deep authority in a few key areas than to be spread too thin across dozens of topics. As your site grows, you can expand your content hubs.
Your Content Hub is an Asset, Not a To-Do List
By shifting your mindset from "writing blog posts" to "building a content hub," you transform your content from a collection of disconnected articles into a strategic asset that builds lasting SEO authority.
A well-architected Webflow CMS doesn't just organize your content; it puts it to work, creating a network of interconnected pages that demonstrates your expertise to users and search engines alike. Once your hub is built, ongoing site maintenance is key to ensuring its technical health and performance remain top-notch.
If you're planning a major content initiative and want to ensure the architecture is flawless from day one, exploring our Webflow development services is a logical next step to building a content engine that drives results.